안녕하세요?
지난 시간에 이어 NextAuth로 NextJS앱에 로그인 로직 만들기 2편을 시작해 보겠습니다.
1편을 못 보신 분들을 위해 링크 걸어 놓겠습니다.
https://cpro95.tistory.com/611
NextAuth.js로 NextJS앱에 로그인 로직 만들기
안녕하세요? 지난 블로그를 보시면 NextAuth를 이용해서 카카오, 네이버, 구글 로그인 구현에 대한 글이 있는데요. 오늘은 카카오 로그인, 네이버 로그인, 구글 로그인 없이 그냥 바닥에서부터 유
cpro95.tistory.com
1편을 복습해 보면 NextAuth의 설정 파일인 /pages/api/auth/[...nextauth].ts 파일의 authorize 함수에서 우리는 로그인 체크 로직없이 그냥 user 객체를 리턴했는데요.
일단 이 부분을 로그인 체크로 바꿔 보겠습니다.
/[...nextauth].ts
async authorize(credentials, req) {
                // Add logic here to look up the user from the credentials supplied

                if (
                    credentials.username === "testuser" &&
                    credentials.password === "test"
                ) {
                    const user = { id: 1, name: "test user", email: "testuser@example.com" }
                    return user;
                }

                return null
            }
이 코드를 보면 credentials 변수의 username이 "testuser" 그리고 password가 "test" 일 때만 user 객체를 리턴하고 그렇지 않으면 null을 리턴하는 방식인데요.
테스트해볼까요?
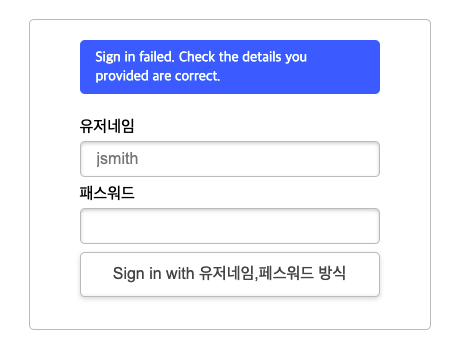
일단 아무것도 넣지 않고 그냥 sign in 버튼을 클릭하니까 에러가 발생했습니다.
그럼 위에서 정한 "testuser"와 비밀번호 "test"를 넣어 볼까요?
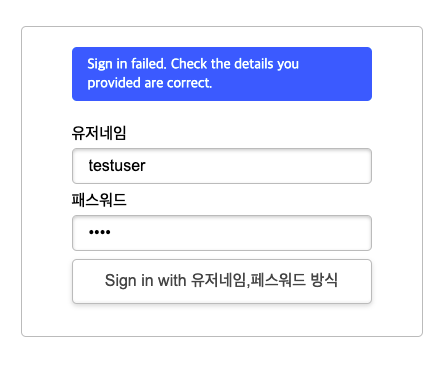
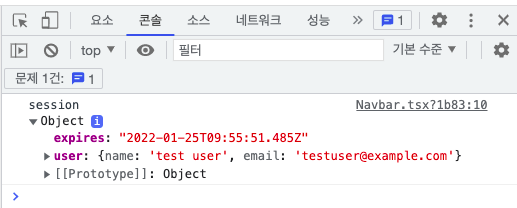
로그인이 성공했네요.
일단 authorize 함수를 우리가 원하는 방식 데로 수정하면 로그인 체크 로직을 만들 수 있을 거 같습니다.
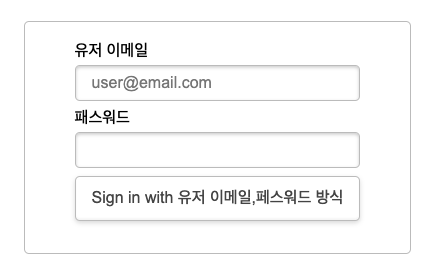
먼저, 로그인 방식을 username / password 형식이 아닌 useremail / password 형식으로 변경하겠습니다.
왜냐하면 useremail이 좀 더 일반적이니까요?
[...nextauth].ts 파일을 다음과 같이 바꾸도록 합시다.
CredentialsProvider({
            // The name to display on the sign in form (e.g. "Sign in with...")
            name: "유저 이메일,페스워드 방식",
            // The credentials is used to generate a suitable form on the sign in page.
            // You can specify whatever fields you are expecting to be submitted.
            // e.g. domain, username, password, 2FA token, etc.
            // You can pass any HTML attribute to the <input> tag through the object.
            credentials: {
                email: { label: "유저 이메일", type: "email", placeholder: "user@email.com" },
                password: { label: "패스워드", type: "password" }
            },
            async authorize(credentials, req) {
                // Add logic here to look up the user from the credentials supplied
                if (
                    credentials.email === "testuser@email.com" &&
                    credentials.password === "test"
                ) {
                    const user = { id: 1, name: "test user", email: "testuser@email.com" }
                    return user;
                }

                return null
            }
        })
name: 부분도 바꿨고,
credentials 부분에서 username을 email로 바꿨고,
밑에 credentials.username 도 credentials.email로 바꿨습니다.
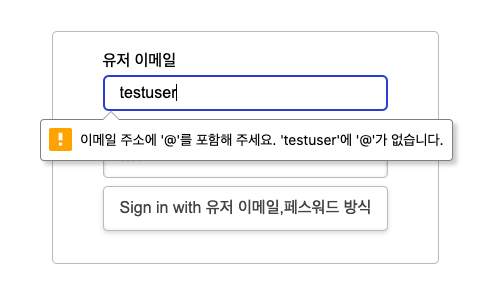
유저 이메일 부분에 그냥 "testuser"라고 입력하면 아래와 같이 에러 체크가 됩니다.
NextAuth에서 제공하는 정말 좋은 기능이네요.
1. DB 적용
지금까지 하드코딩 방식으로 로그인 로직을 완성했는데요.
자바스크립트에 하드코딩으로 패스워드를 저장하는 방식은 상당히 위험한데요.
그냥 혼자 보려는 홈페이지면 상관이 없겠지만 그래도 이왕 만들 거면 제대로 된 방식의 유저 매니지먼트 기능을 넣는 것이 좋을 거 같은데요.
이럴 때 필요한 게 웹앱에서 사용할 DB입니다.
MongoDB, PostgreSql, MySql 등 여러 가지 DB가 있는데요.
우리가 최종적으로 사용할 DB는 무료 저장소를 제공해 주는 MongoDB를 쓸 예정입니다.
2. Prisma 설치
React 앱에서 DB 관련 부분을 쉽게 해주는 라이브러리가 있는데, 최근에 각광받고 있는 Prisma 라이브러리가 있습니다.
Prisma - Next-generation Node.js and TypeScript ORM for Databases
Prisma is a Node.js and TypeScript ORM that can be used to build GraphQL servers, REST APIs, microservices & more.
www.prisma.io
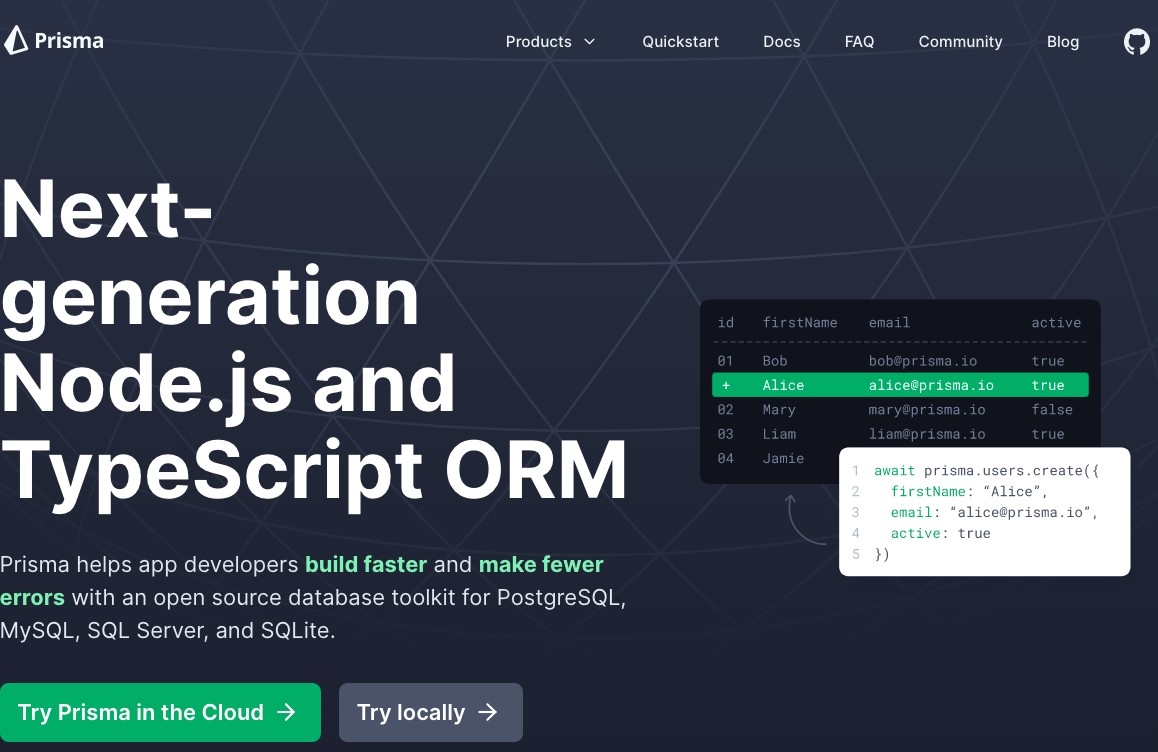
NodeJS와 Typescript의 ORM, 즉, 관계형 데이터베이스 구축을 쉽게 해주는 라이브러리입니다.
Prisma 버전이 2 였을 때는 아직 MongoDB 부분이 구현이 안됐었는데요.
Prisma 버전이 3으로 올라가면서 MongoDB 부분이 preview 형식으로 일단은 사용 가능해졌습니다.
나중에 Prisma 가 완벽하게 MongoDB를 지원할 날이 얼마 남지 않을 거 같네요.
그럼, 일단은 Prisma를 설치해 보겠습니다.
Prisma는 prisma와 @prisma/client 두 개의 부분으로 구성되는데요.
prisma는 DB 부분이고 @prisma/client는 prisma를 react 앱과 연결하는 부분입니다.
다음과 같이 설치하도록 합시다.
npm i -D prisma
npm i @prisma/client

or

yarn add -D prisma
yarn add @prisma/client
이제 prisma를 설정해야 하는데요.
터미널 창에서 다음과 같이 실행시킵시다.
npx prisma initprisma 초기화 명령인데요.
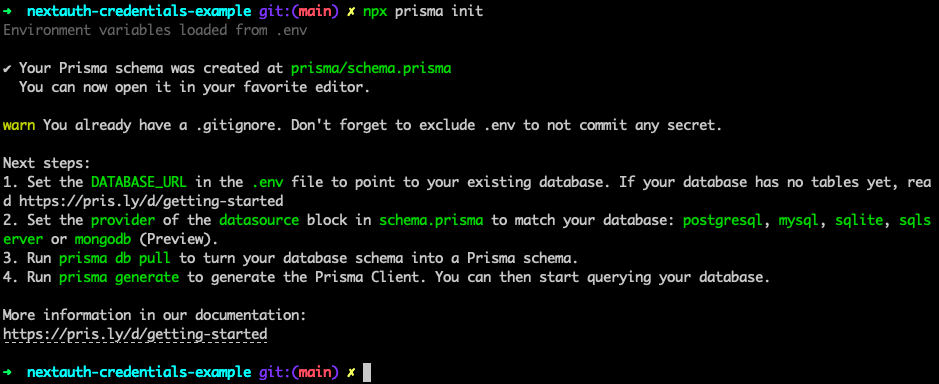
위와 같이 실행하니까 최상단 폴더에서 prisma 폴더를 만들었고
그리고 prisma 폴더에 다음과 같이 schema.prisma 파일을 만들었습니다.
/prisma/schema.prisma
// This is your Prisma schema file,
// learn more about it in the docs: https://pris.ly/d/prisma-schema

generator client {
  provider = "prisma-client-js"
}

datasource db {
  provider = "postgresql"
  url      = env("DATABASE_URL")
}
schema.prisma 파일은 prisma 설정 파일인데요.
위에서 보듯이 datasource db 부분에 provider를 "postgresql"로 지정되어 있습니다.
우리는 여기서 postgresql을 sqlite로 바꾸도록 하겠습니다.
// This is your Prisma schema file,
// learn more about it in the docs: https://pris.ly/d/prisma-schema

generator client {
  provider = "prisma-client-js"
}

datasource db {
  provider = "sqlite"
  url      = "file:mydb.db"
}
sqlite로 넣은 이유는 일단은 개발 모드에서 로컬 DB로 개발하는 게 빠르기 때문입니다.
그리고 웹상에 배포할 때 provider를 "mongodb"로 바꾸면 되기 때문입니다.
나중에 mongodb 부분은 설정과 함께 좀 더 세세하게 설명할 예정입니다.
일단은 로그인 구현이 목적이고, 좀 더 빠른 개발 환경을 위해 sqlite로 진행해 보겠습니다.
3. Prisma Model 설정
이제 Prisma를 설치했으니까 DB 부분을 설계해야 하는데요.
Prisma에서는 model이라고 합니다.
이 model을 schema.prisma 파일에 작성하는데요.
우리가 필요한 거는 유저 로그인 부분이니까 유저(User)라는 모델을 만들어 보겠습니다.
/prisma/schema.prisma
// This is your Prisma schema file,
// learn more about it in the docs: https://pris.ly/d/prisma-schema

generator client {
  provider = "prisma-client-js"
}

datasource db {
  provider = "sqlite"
  url      = "file:mydb.db"
}

model User {
  id        Int      @id @default(autoincrement())
  email     String   @unique
  name      String?
  password  String
  createdAt DateTime @default(now()) @map(name: "created_at")
  updatedAt DateTime @updatedAt @map(name: "updated_at")
}
위의 코드를 보면 model User라고 되어 있는데요.
이 User에는 id, email, name, password가 있습니다.
그리고 createdAt과 updatedAt이 있는데요.
createdAt과 updatedAt는 Prisma 가 model User 부분에 추가, 수정이 발생했을 때 자동으로 설정됩니다.
이렇게 model을 만들었으면 이 Prisma model을 코드로 이주(migrate)시켜야 하는데요.
터미널 창에서 다음과 같이 실행하면 됩니다.
npx prisma migrate dev
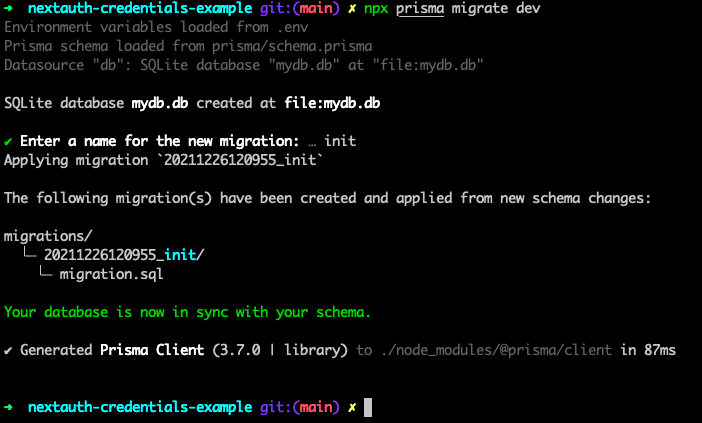
위 명령어를 실행시키면 "Enter a name for the new migration"을 입력하라고 하는데요.
migration은 우리가 schema.prisma 파일을 바꿀 때마다 위 명령어를 실행해서 Model을 우리의 NodeJS가 이해할 수 있도록 코드화 하는 겁니다.
그래서 model User를 추가 변경하거나, 다른 모델을 만들 때마다 npx prisma migrate 명령어를 새로 실행시켜줘야 합니다.
이때 migrate 한번 할 때마다 그 migrate의 이름을 적는 게 있습니다.
바로 위의 "Enter a name for the new migration"에 해당되는 게 바로 그겁니다.
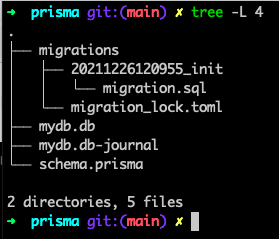
migrate를 실행시킨 후의 prisma 폴더 안의 내용인데요.
우리의 sqlite DB 파일인 mydb.db 파일도 보이고 그리고 migrations 폴더도 보입니다.
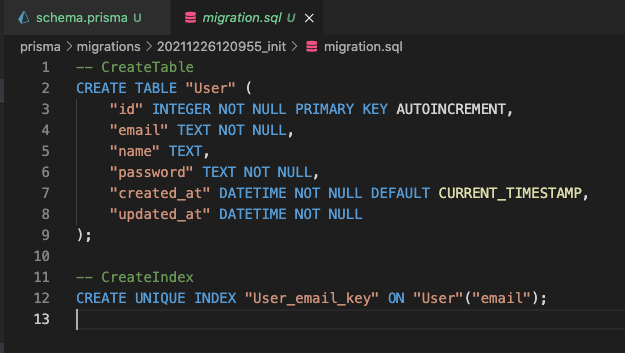
migration.sql 파일을 열어보면 SQL 명령어가 보입니다.
우리가 schema.prisma 에서 작성한 model을 SQL 방식으로 변환한 겁니다.
이제 Prisma를 이용한 DB 준비는 끝났는데요.
이제 이 DB에 데이터를 저장하고 읽어 오는 루틴을 작성하면 됩니다.
4. Signup 로직 작성
이제 DB도 준비되었고 본격적으로 로그인 로직을 위한 준비에 들어가 보도록 하겠습니다.
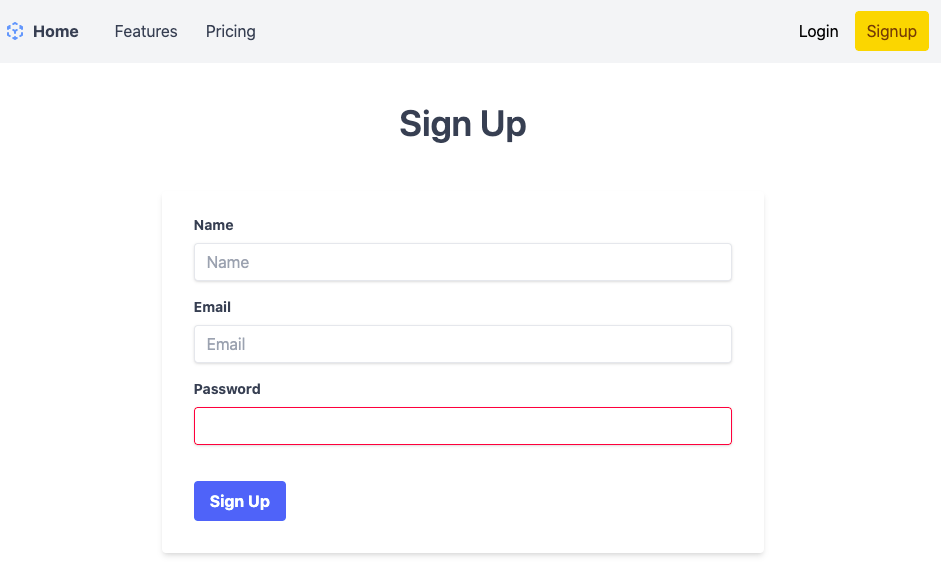
먼저 유저를 생성하는 SignUp 페이지를 작성해 보겠습니다.

우리 홈페이지의 상단 Navbar 오른쪽에 보면 Signup 링크가 보입니다.
이 링크를 클릭하면 signup 페이지도 이동하도록 할 예정입니다.
먼저, Navbar 부분에서 Signup 부분을 다음과 같이 수정하도록 합시다.
{/* secondary nav */}
          {status === "authenticated" ? (
            <div className="hidden md:flex items-center space-x-1">
              <button className="py-5 px-3" onClick={() => signOut()}>Log out</button>
            </div>
          ) : (
            <div className="hidden md:flex items-center space-x-1">
              <a href="/api/auth/signin" className="py-5 px-3">
                Login
              </a>
              <a
                href="/signup"
                className="py-2 px-3 bg-yellow-400 hover:bg-yellow-300 text-yellow-900 hover:text-yellow-800 rounded transition duration-300"
              >
                Signup
              </a>
            </div>
          )}


          ....
          ....
          ....


 {status === "authenticated" ? (
          <button className="block py-2 px-4 text-sm hover:bg-gray-200" onClick={() => signOut()}>Log out</button>
        ) : (
          <div>
            <a
              href="/api/auth/signin"
              className="block py-2 px-4 text-sm hover:bg-gray-200"
            >
              Login
            </a>
            <a href="/signup" className="block py-2 px-4 text-sm hover:bg-gray-200">
              Signup
            </a>
          </div>
        )}
Signup 링크의 a 태그에서 href 부분을 "/signup"으로 바꿨습니다.
이제 Signup 링크를 클릭해보면 페이지가 없다는 에러가 나옵니다.
왜냐하면 아직 signup 페이지를 만들지 않았기 때문이죠.
/pages/signup.tsx 파일을 만들어서 "/signup" 라우팅에 대응해 보도록 하겠습니다.
/pages/signup.tsx
import React, { useState, useRef } from "react";
import { useSession } from "next-auth/react";
import { useRouter } from "next/router";

const Signup: React.FC = (props) => {
  const [formStatus, setFormStatus] = useState<string>(null);

  const nameInputRef = useRef<HTMLInputElement>(null);
  const emailInputRef = useRef<HTMLInputElement>(null);
  const passwordInputRef = useRef<HTMLInputElement>(null);

  const { status } = useSession();
  const router = useRouter();

  async function submitHandler(event: React.SyntheticEvent) {
    event.preventDefault();
  } // end of submitHandler function

  if (status === "authenticated") {
    router.replace("/");
    return (
      <div>
        <h1>Sign Up</h1>
        <div>You are already signed up.</div>
        <div>Now redirect to main page.</div>
      </div>
    );
  }

  return (
    <div className="container px-5 py-10 mx-auto w-2/3">
      <div className="text-center mb-12">
        <h1 className="text-4xl md:text-4xl text-gray-700 font-semibold">
          Sign Up
        </h1>
      </div>
      <form
        onSubmit={submitHandler}
        className="bg-white shadow-md rounded px-8 pt-6 pb-8 mb-4"
      >
        <div className="mb-4">
          <label
            className="block text-gray-700 text-sm font-bold mb-2"
            htmlFor="name"
          >
            Name
          </label>
          <input
            className="shadow appearance-none border rounded w-full py-2 px-3 text-gray-700 leading-tight focus:outline-none focus:shadow-outline"
            id="name"
            type="text"
            placeholder="Name"
            required
            ref={nameInputRef}
          />
        </div>
        <div className="mb-4">
          <label
            className="block text-gray-700 text-sm font-bold mb-2"
            htmlFor="email"
          >
            Email
          </label>
          <input
            className="shadow appearance-none border rounded w-full py-2 px-3 text-gray-700 leading-tight focus:outline-none focus:shadow-outline"
            id="email"
            type="text"
            placeholder="Email"
            required
            ref={emailInputRef}
          />
        </div>
        <div className="mb-6">
          <label
            className="block text-gray-700 text-sm font-bold mb-2"
            htmlFor="password"
          >
            Password
          </label>
          <input
            className="shadow appearance-none border border-red-500 rounded w-full py-2 px-3 text-gray-700 mb-3 leading-tight focus:outline-none focus:shadow-outline"
            id="password"
            type="password"
            required
            ref={passwordInputRef}
          />
          <p className="text-red-500 text-xs italic">
            {/* Please choose a password. */}
            {formStatus}
          </p>
        </div>
        <div className="flex items-center justify-between">
          <button
            className="bg-blue-500 hover:bg-blue-700 text-white font-bold py-2 px-4 rounded focus:outline-none focus:shadow-outline"
            type="submit"
          >
            Sign Up
          </button>
        </div>
      </form>
    </div>
  );
};

export default Signup;
뭔가 코드가 많아 보이는데요.
일단 UI 부분에서 form과 useRef를 이용해서 form을 submit 하기 위한 준비를 마쳤습니다.
TailwindCSS 부분은 제 TailwindCSS 강좌를 보시면 이해할 수 있을 거고요.
여기서 중요한 부분이 있는데 useSession() 훅을 이용해서 status를 불러옵니다.
그래서 status 가 authenticated 일 때 즉, 유저가 로그인된 상태일 때는 그냥 바로 "/" 주소로 이동됩니다.
if (status === "authenticated") {
    router.replace("/");
    return (
      <div>
        <h1>Sign Up</h1>
        <div>You are already signed up.</div>
        <div>Now redirect to main page.</div>
      </div>
    );
  }
위 코드가 바로 현재 상태가 authenticated 일 때 router.replace("/") 명령으로 홈페이지의 루트("/")로 강제 이동하는 거죠.
로그인 한 유저가 다시 가입할 일은 없으니까요!
5. Signup api 작성(UI)
이제 Sign Up 폼의 submit 핸들링 코드를 작성해야 하는데요.
위에서 잠깐 보였던 submitHandler 함수가 바로 그 코드입니다.
그럼 submitHandler 함수를 마저 작성해 볼까요?
async function submitHandler(event: React.SyntheticEvent) {
    event.preventDefault();

    const enteredName = nameInputRef.current?.value;
    const enteredEmail = emailInputRef.current?.value;
    const enteredPassword = passwordInputRef.current?.value;

    // optional: Add validation

    try {
      const result = await createUser(
        enteredName,
        enteredEmail,
        enteredPassword
      );
      console.log(result);
      setFormStatus(`Sign up Success: ${result.message}`);
      // window.location.href = "/";
      router.replace("/login");
    } catch (error) {
      console.log(error);
      setFormStatus(`Error Occured: ${error.message}`);
    }
  } // end of submitHandler function
submitHandler 함수는 간단합니다.
useRef를 이용해서 Form에 입력한 값을 가져오고 그걸 이용해서 createUser 함수를 이용해서 User를 만듭니다.
그리고 createUser 가 성공하면 성공 메시지를 보여주고 다시 "/login" 주소로 홈페이지를 이동시켜 버립니다.
그리고 에러가 발생하면 에러 메시지를 보여주는 방식입니다.
그럼 이제 createUser 함수를 작성해 볼까요?
import React, { useState, useRef } from "react";
import { useSession } from "next-auth/react";
import { useRouter } from "next/router";

async function createUser(
  name: string,
  email: string,
  password: string
): Promise<any> {
  const response = await fetch("/api/auth/signup", {
    method: "POST",
    body: JSON.stringify({ name, email, password }),
    headers: {
      "Content-Type": "application/json",
    },
  });

  const data = await response.json();

  if (!response.ok) {
    throw new Error(data.message || "Something went wrong!");
  }

  return data;
}

const Signup: React.FC = (props) => {
....
....
....
....
}
뭔가 굉장히 어려운 코드 같은데요.
쉽게 하나하나 풀어가 보겠습니다.
먼저 createUser 함수는 인자로 name, email, password를 string 타입으로 받아들이고,
Promise <any>를 리턴하는 비동기식(async) 함수입니다.
함수의 시작은 바로 비동기 await 구문부터 시작하는데요.
await fetch("/api/auth/signup",...) 부분인데요.
fetch는 특정 주소로 Request를 요청하면 Response가 오는 명령어입니다.
React로 fetch 하는 방법은 여러 가지가 있는데 우리는 여기서 그냥 가장 일반적인 fetch 함수를 이용했습니다.
fetch 함수의 두 번째 인자는 바로 객체인데요.
Request 부분의 특징을 정의한 객체입니다.
우리는 method 가 "POST" 방식의 Request를 보낼 거고,
body 부분은 name, email, password를 JSON 형식으로 stringify 했습니다.
그리고 headers 부분도 "application/json" 형식으로 지정했습니다.
이렇게 fetch로 Request를 보내면 response가 오는데요.
바로 const response = fetch(....)처럼 response에 fetch의 리턴을 저장합니다.
그리고 그다음 const data = await response.json() 명령어로 response를 json() 함수를 실행한 후 data에 저장합니다.
그리고 response의 에러 체크를 하고 최종적으로 data를 돌려주는 함수인 거죠.
그럼 한번 테스트해볼까요?
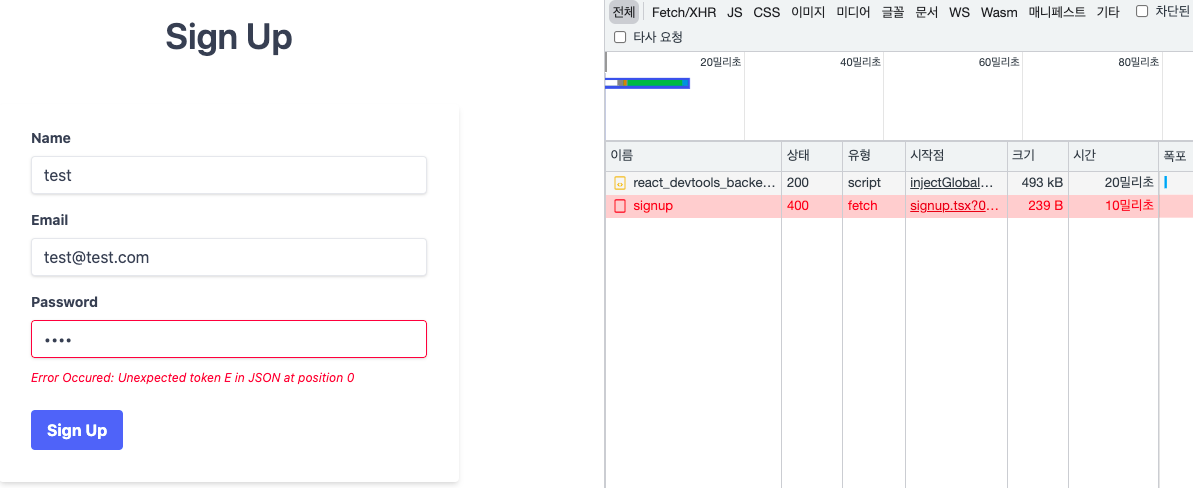
signup 페이지에서 400 에러 코드가 발생했는데요.
400 은 바로 잘못된 Request입니다.

왜 에러가 발생했을까요?
바로 fetch 하는 URL이 반응을 안 해서 그렇습니다.
그 URL 이 바로 "/api/auth/signup" 부분인데요.
NextJS에서 API 부분을 담당하는 서버사이드 코드 부분입니다.
즉, /pages/api/auth/signup.ts 파일을 만들어서 /api/auth/signup URL에 대응토록 해야 합니다.
6. Signup api 작성(fetch request)
일단 /pages/api/auth 폴더에 signup.ts라는 파일을 만듭시다.
/pages/api/auth/signup.ts
import { NextApiRequest, NextApiResponse } from 'next';

async function handler(req: NextApiRequest, res: NextApiResponse) {
    if (req.method !== 'POST') {
        return;
    }

    const data = req.body;

    const { name, email, password } = data;

    const result = { id: 1, name: name, email: email }

    if (result) {
        res.status(201).json({ message: 'Created user!', error: false });
    } else {
        res.status(422).json({ message: 'Prisma error occured', error: true })
    }
}

export default handler;
NextJS의 특징 중 하나가 서버사이드 로직을 직접 만들 수 있다는 점인데요.
바로 /pages/api 폴더 밑에 위치만 시키면 서버사이드 쪽에서 실행됩니다.
위의 signup.ts 코드를 보시면 아까 signup form에서 submitHandle 했던 Request에 대응하는 코드인데요
일단은 더미 코드로 작성해 보았습니다.
일단 테스트를 위해 Signup.tsx 파일의 submitHandler 함수에서 router.replcae("/login") 코드를 주석 처리해 보겠습니다.
// router.replace("/login");
어떻게 Api fetch의 반응이 나타나는지 알아보기 위해서입니다.
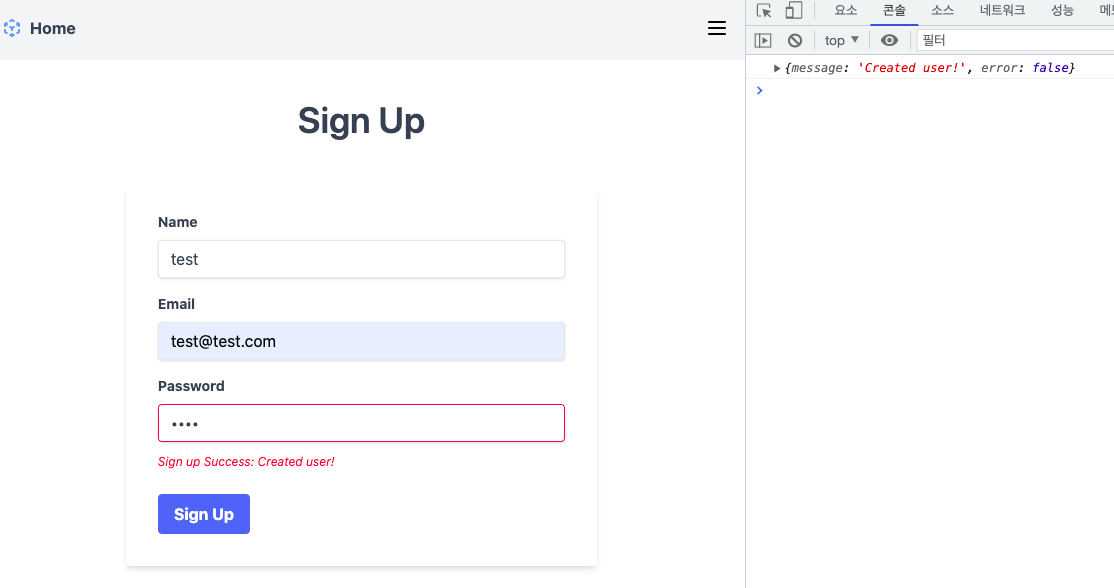
실행 결과는 대 만족입니다.
메시지도 잘 보이고 작동도 잘 되네요.
그럼 이제 signup.ts 코드에서 직접 Prisma를 이용해서 DB 부분을 작성해야 하는데요.
다음 시간에 작성해 보겠습니다.
참고로 지금까지 작성된 signup.tsx 파일 전체입니다.
/pages/signup.tsx
import React, { useState, useRef } from "react";
import { useSession } from "next-auth/react";
import { useRouter } from "next/router";

async function createUser(
  name: string,
  email: string,
  password: string
): Promise<any> {
  const response = await fetch("/api/auth/signup", {
    method: "POST",
    body: JSON.stringify({ name, email, password }),
    headers: {
      "Content-Type": "application/json",
    },
  });

  const data = await response.json();

  if (!response.ok) {
    throw new Error(data.message || "Something went wrong!");
  }

  return data;
}

const Signup: React.FC = (props) => {
  const [formStatus, setFormStatus] = useState<string>(null);

  const nameInputRef = useRef<HTMLInputElement>(null);
  const emailInputRef = useRef<HTMLInputElement>(null);
  const passwordInputRef = useRef<HTMLInputElement>(null);

  const { status } = useSession();
  const router = useRouter();

  async function submitHandler(event: React.SyntheticEvent) {
    event.preventDefault();

    const enteredName = nameInputRef.current?.value;
    const enteredEmail = emailInputRef.current?.value;
    const enteredPassword = passwordInputRef.current?.value;

    // optional: Add validation

    try {
      const result = await createUser(
        enteredName,
        enteredEmail,
        enteredPassword
      );
      console.log(result);
      setFormStatus(`Sign up Success: ${result.message}`);
      // window.location.href = "/";
      // router.replace("/login");
    } catch (error) {
      console.log(error);
      setFormStatus(`Error Occured: ${error.message}`);
    }
  } // end of submitHandler function

  if (status === "authenticated") {
    router.replace("/");
    return (
      <div>
        <h1>Sign Up</h1>
        <div>You are already signed up.</div>
        <div>Now redirect to main page.</div>
      </div>
    );
  }

  return (
    <div className="container px-5 py-10 mx-auto w-2/3">
      <div className="text-center mb-12">
        <h1 className="text-4xl md:text-4xl text-gray-700 font-semibold">
          Sign Up
        </h1>
      </div>
      <form
        onSubmit={submitHandler}
        className="bg-white shadow-md rounded px-8 pt-6 pb-8 mb-4"
      >
        <div className="mb-4">
          <label
            className="block text-gray-700 text-sm font-bold mb-2"
            htmlFor="name"
          >
            Name
          </label>
          <input
            className="shadow appearance-none border rounded w-full py-2 px-3 text-gray-700 leading-tight focus:outline-none focus:shadow-outline"
            id="name"
            type="text"
            placeholder="Name"
            required
            ref={nameInputRef}
          />
        </div>
        <div className="mb-4">
          <label
            className="block text-gray-700 text-sm font-bold mb-2"
            htmlFor="email"
          >
            Email
          </label>
          <input
            className="shadow appearance-none border rounded w-full py-2 px-3 text-gray-700 leading-tight focus:outline-none focus:shadow-outline"
            id="email"
            type="text"
            placeholder="Email"
            required
            ref={emailInputRef}
          />
        </div>
        <div className="mb-6">
          <label
            className="block text-gray-700 text-sm font-bold mb-2"
            htmlFor="password"
          >
            Password
          </label>
          <input
            className="shadow appearance-none border border-red-500 rounded w-full py-2 px-3 text-gray-700 mb-3 leading-tight focus:outline-none focus:shadow-outline"
            id="password"
            type="password"
            required
            ref={passwordInputRef}
          />
          <p className="text-red-500 text-xs italic">
            {/* Please choose a password. */}
            {formStatus}
          </p>
        </div>
        <div className="flex items-center justify-between">
          <button
            className="bg-blue-500 hover:bg-blue-700 text-white font-bold py-2 px-4 rounded focus:outline-none focus:shadow-outline"
            type="submit"
          >
            Sign Up
          </button>
        </div>
      </form>
    </div>
  );
};

export default Signup;
'코딩 > React' 카테고리의 다른 글
| Supabase로 로그인 구현하기 with NextJS 1편 (1) | 2022.01.05 |
|---|---|
| NextAuth.js로 NextJS앱에 로그인 로직 만들기 3편 (3) | 2021.12.28 |
| NextAuth.js로 NextJS앱에 로그인 로직 만들기 (3) | 2021.12.26 |
| NextJS + Typescript + TailwindCSS 적용 2편 (2) | 2021.12.26 |
| NextJS + Typescript + TailwindCSS 설치 방법 (2) | 2021.12.26 |